Sunday, March 28, 2021

Facebook?

 A couple of years ago I dropped out of Facebook because of rude partisans on both sides of the political spectrum and the absence of a mechanism to keep them out of my feed without hurting feelings.

But recently I learned about a https://www.facebook.com/groups/wargamingntrule/?ref=share. This group is for people who love One Hour Wargames and other books written by Neil Thomas.  Scenarios from OHW frequently are employed by members. The members of the group and friendly and supportive.

Yes, I went back to Facebook.  But this time I set it to have no friends and all my posts are private.  I do not post except on the Neil Thomas page and I do not read the feed.

We will see if this works out better than last time.

Tuesday, March 23, 2021

Scenario 7/Dark Age

The reader may have noticed that I am using Airfix figures.  Airfix did not make Dark Age sets, so here is my substitution process:

  • French cavalry for Dark Age cavalry.  Note: cavalry dismount to fight.
  • Roman legions for infantry.  This includes men with swords and axes (warband in the Dark Ages), spearmen (infantry) and a few archers.
  • Merry Men set.  This provides archers (assumed to be Dark Age skirmishers) and stick fighters (treated as regular infantry).

Net result is warbands, cavalry, regular infantry and skirmishers.  One Hour Wargames rules call for random selection of units, but I do not have enough of each to allow for that.  Still, I am able to mix them up somewhat and neither side has exactly the same mix of unit types in this battle.

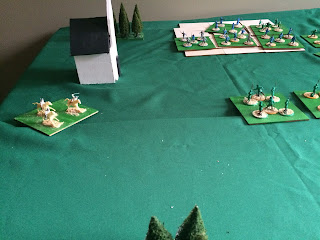
Scenario seven has a large hill on the north side.  All of the Danes are on that hill. Two Saxon units are on the small hill to the south and four Saxon units are hidden on the east side. See pictures 1-3.  The Danes are mostly blue and the Saxons are mostly green.


Picture 1.

Picture 2.

Picture 3.

The Saxons march down from the hill and move north.  These two units are skirmishers.  The Saxons on the east emerge from hiding and begin to flank the Danish units on the hill.  The Danish cavalry descend from the hill and one charges toward an infantry unit. Not a smart move; another Saxon infantry unit flanks it and now the cavalry are in a sandwich (Picture 4). 


Meanwhile, one Saxon infantry unit runs up the hill and charges a Danish warband (Picture 5).

Picture 5.


Picture 6.  The Saxon skirmishers are throwing javelins up onto the hill. (Use your imagination, for Pete's sake.)


Picture 7.  A Danish cavalry unit is swinging around for a flank attack on the skirmishers.  

The flank attack on the Saxon skirmisher unit could have wiped them out but the die turned up a 1: only 2 points damage.  The skirmishers turn to face their flankers and now it is shield-wall against shield-wall.  Neither side can do much damage.  However, on the east side of the battlefield the Saxons wipe out the Danish cavalry then gang up on the infantry.  Two-on-one carries the day every time.  At the end, only the Danish skirmishers are left and they are smashed as soon as the Saxon infantry can reach them (Picture 8).


A good dark age site

 https://darkages40and25.blogspot.com/2021/

The author reports his battles in a clear and understandable way.  His layout is achievable but most with a little effort and his suggestions make sense.

Monday, March 22, 2021

Scenario 6/Dark Age


Uhtred is leading the English Saxon army against Guthrum the Unlucky.  Both sides have five units. Guthrum has two warbands, one infantry, one skirmisher, and one cavalry.  Uhtred has two warbands, two skirmisher units and one cavalry.  Guthrum seeks to travel from south to north and exit the field on the north side.  Uhtred intends to flank Guthrum's army at the opportune time.  Timing is important.


Picture 1.  Initial Positions.


Uhtred had positioned two warbands at the north edge of the field, blocking the road.  As the Danes move northward, the Saxons launch their flank attacks.   The two Saxon skirmish units are trying to get close enough to throw javelins but not so close that the Danes can rush them.

Picture 2.  The Saxon cavalry hit a Danish warband in the rear but the Danish cavalry then flanked them.


The Danish infantry and one warband reached the roadblock at the north end of the field and all units formed shield walls.  Somehow two skirmish units found themselves in a hand-to-hand battle.  I assumed that they formed clumsy shield walls. The other Saxon skirmish unit is unable to help any of its fellows because they cannot throw javelins into a melee (picture 3).  The Saxons seem to be squandering their surprise attack.

Picture 3.  The flanking maneuvers are going badly.

However, it turned out well for the Saxons.  As expected, the Saxon cavalry was scattered, allowing the Danes to go after the Saxon skirmishers. The first Saxon skirmisher unit finished off its opponent but had taken several hits in the process.  The Danes quickly destroyed one skirmish unit.  However, the Danish warband on the north was scattered and the Saxon warband then flanked the Danish infantry unit.  Assaulted from two sides, it collapsed.  The Saxon warbands rushed toward Danes, arriving too late to save the last skirmisher unit but soon enough to destroy the warband.  The Danes only had one unit left, the cavalry.  They raced for the northern edge of the field and escaped (picture 4).  

Picture 4.  The Danish cavalry escape.

None of this unfolded as expected.  However, the Saxons won.  The Danes needed to exit three units to be declared winners. Guthrum the Unlucky was lucky at first but his luck ran out in the end.


Thursday, March 18, 2021

Scenario 5: Uhtred vs Ubba

 In the previous post, Saxon invaders led by someone I called Uhtred were fighting the British king, Arthur.  Fast forward a couple of hundred years.  We are still in the Dark Ages.  The Saxons succeeded in conquering most of England.  A Saxon English king, Alfred, is defending against a Danish invasion.  In this scenario, Uhtred of Bebbanburg, a descendant of the  first Uhtred, is leading the English forces in a battle against the fearsome Danish warrior, Ubba.  This plot line is taken from the popular series about Uhtred authored by Bernard Cornwell.  In Cornwell's story, the English forces are on a hill but they descend to set fire to the Danish boats.  I am using Scenario 4 from One Hour Wargames, so there are no boats.  English forces will stay on the hill as long as they can.  Ubba will attempt to take the hill.

All units will form shield walls when fighting face to face.  The archers actually are skirmishers throwing javelins.  They will avoid hand-to-hand combat. Cavalry units travel fast but are assumed to  dismount and fight on foot when they see an opportunity for a flank attack.  They will form shield walls in face-to-face battles.

Note: north is to the left in the pictures.

The armies position for battle.  The Danes are on the right (south).  They will attack the hill frontally and also flank the east and west sides of it.  The cavalry on both sides are holding themselves in reserve.  The first picture shows the flanking and frontal attacks have begun.  The English attack the western Danes on the flank. 


Picture 1.  The battle is joined.


Both of the English units on the hill have the uphill advantage against their frontal attackers.  Also, they are in shield wall formation, so that reduces hits even more.  However, the flank attacks are devastating and the hill is taken by the Danes (picture 2).

Picture 2.  The Danes take possession of the hill.

All is not lost for Uhtred, however.  The Saxon skirmishers continue to throw javelins at the Danes on the hill (picture 3). The English Saxon cavalry flanks the Danish skirmishers and quickly routs them.  That unit now is ready to flank the Danes from the east side of the hill.  The Saxon infantry finishes off its opponents and now can move up the hill from the west.   

Picture 3.  The Danes have the hill but now Uhtred's army can flank them.


The Danish infantry on the hills rushed down the north face to attack the skirmishers, a move that would quickly scatter the skirmishers under normal circumstances.  Both sides formed their shield walls.  The Danish cavalry formed shield wall against the Saxons climbing toward them on the west side and destroyed them.  However, the Saxon cavalry and skirmishers wiped out the last Danish infantry unit (Ubba died bravely in a axe-vs-sword fight with Uhtred) and then hit the Danish cavalry.  It was quickly routed, leaving the Saxon cavalry in possession of the hill (picture 4).


Picture 4.  Uhtred's cavalry possess the hill.  


This battle washed back and forth across the hill.  The action was rapid and both sides fought well.  In the end, the skirmishers and the cavalry carried the day, which is an interesting result. 

Being a fan of the Last Kingdom series, I found pitting Uhtred against Ubba on a hill very exciting, since that is where they fought in the book. Uhtred will fight another battle against Danes next week.  


Wednesday, March 17, 2021

Scenario 4: Arthur's Dilemma

 This is a dark age battle.  King Arthur is defending Britain against a Saxon invasion led by Uhtred the eldest.  Arthur is on the north side (left in the picture) and Uhtred is coming up from the south (right side).  

Previously I learned that conventional figure bases are necessary in battles that have a hand-to-hand element.  This in turn requires a bit more space so this battle is back on the card table and not on the floating grid.  

Notice that a road runs left to right across the battlefield.  It is not helpful.

Scenario 4 has a hill in the center that is occupied by two of Arthur's infantry units.  Arthur also has two units of skirmishers, one cavalry and a reinforcing infantry unit.  Due to a shortage of skirmish figures, I am using archers to depict skirmishers.  Just assume they are throwing javelins instead of shooting bows.

Uhtred has four infantry units, one skirmisher unit and one cavalry unit.  I chose not to include a warband, making the assumption that all infantry would form shield walls when fighting face-to-face. 

In the first picture, the Saxons are advancing toward the hill.  The cavalry is sheltering behind some trees.  The skirmishers are approaching toward the point where they will be within range.   They will avoid hand-to-hand combat if possible.  If necessary, they will attack on the flank.  Frontal attacks with skirmishers are suicidal. 


The fourth Saxon infantry unit moved toward the west side of the hill where they were met by the first British infantry.  They formed shield walls and went at it. When the first Saxon infantry unit was close enough for a flank attack on the east side of the hill they charged, as did the two infantry units on the south side.  The hill was encircled on three sides.  If the Saxons could scatter their opponents, they would be able to rotate and mount a flank attack on the hill.

The British infantry units on the hill enjoyed protection from the elevation and also protection from their shield walls. The Saxons were doing a lot of damage with their flank attack but not so much with their uphill fights.  The British skirmishers were hurling javelins at the Saxons who were flanking the hill.  The Saxon skirmishers were throwing at the British skirmishers.  

Eventually, the first British infantry unit on top of the hill was broken.  The Saxon infantry unit who had been flanking it took possession.  But the British cavalry who were holding reserve rushed over to flank attack the Saxon position on the hill.  Already weakened by javelin fire, the Saxons were routed. The British cavalry continued on over the hill to attack the Saxon infantry on the slope.

Meanwhile the Saxon cavalry emerged from hiding to assault the British skirmishers on the flank and scatter them.  Units were being routed right and left.  The Saxon cavalry flanked the British cavalry and destroyed them. At the end, the first British infantry had managed to relieve the hill but they were faced by Saxon cavalry on the other side of the hill and the surviving Saxon infantry unit was approaching down-slope (see second picture).  This was the 15th round and the battle was over.  27 minutes elapsed time.   


Sunday, March 14, 2021

Scenario 3: Boudica's Revolt

 In AD 60, Queen Boudica led a revolt against the Imperial Romans who occupied Britain.  She marched on Lindinium to wreak havoc on the oppressors.  The Imperials were caught off-guard.  

This battle uses Scenario 3 from One Hour Wargames.  The western ford is shown in picture 1.  Boudica's forces are on the left (north).  Boudica had two cavalry units, one light infantry and three heavy infantry units.   The second picture shows the eastern ford.  The Imperial Romans had one archer, two light infantry at the western ford, and three heavy infantry units at the eastern ford. 

Most of the action took place in the fords.  Two units could engage two other units face to face on the narrow passages. Flanking was only possible after one of the facing units was destroyed.  In addition, the Roman archer unit was able to pepper the Celtic heavy infantry unit that was waiting in reserve.  Those Celts finally had to withdraw out of range because they was taking hits while not giving any. Both Celtic cavalry units were shattered.  This was not good for Boudica, but meanwhile the cards and the dice were helping her army.  The eastern ford was taken by the Celts.  In the next turn, the western ford fell also.  Only the Roman archers survived (picture 3).  

The battle was exciting and lasted 29 minutes.  This was my first ancient-era battle and I enjoyed it.  The OHW scenarios work as well for the ancient era as they do for machine era or any other.  Being short of ancient cavalry, I substituted Maid Marion from the Merry Men set and one WWI cavalry rider from the WWI horse artillery. 

Note: My figures are individually based instead of based with a frontage of 4-6 inches as recommended by Thomas.  This battle finally showed me the reason for the recommended basing.  Had I based them correctly, only one unit could have been in a ford at a home time. No flanking would have been possible.  More units would have been forced to wait in reserve until the units in combat were broken.  This would have extended the battle.  


Thursday, March 11, 2021

Tactical Principles for Wargaming


Most countries have lists of principles for wars.  They tend to look about the same but with different principles emphasized in different armies (https://en.wikipedia.org/wiki/Principles_of_war).  

Drawing from those lists plus other material about Clausewitz and von Moltke the elder, I came up with this list.  It might be all wrong but I am trying to use them in my battles. 

1.  Concentration of force.  The force multiplier effects allows a concentrated force to break through the enemy line.  However, only a dummy (like me) will put all his forces into one blob and ram them against the enemy.  The enemy will swing his units around and attack you from multiple directions.  See number four below.

2.  Economy of force. Do not use many resources in areas other than the main objective.  If you have to take some risk by weakening secondary areas, it is worth it.

3.  Maneuver.  Selectively apply combat to gain positional advantage.  Goad or lure the enemy into the position where you will have the advantage.  See number five below. 

4.  Encirclement. If possible, bring the enemy to battle on more than one side. See number six below.

5.  Strategic offense/tactical defense.  Lure the enemy into attacking your well-fortified position.

6.  Units travel separately.  Send your units toward the enemy separately rather than as a combined force.  Plan to swing around and hit them on more than one side. 

Do you agree?  What have I left out?


Wednesday, March 10, 2021

Personality and Solo Wargaming

 Overgeneralizing is dangerous, but assuming solo wargamers are more introverted than social wargamers might not be a big risk.  Introversion is a technical term so I should be careful about what I say on the subject, not being an expert.  However, I am an introvert so maybe I know enough.

Googling will lead to all kinds of half-baked info about introverts when compared to extroverts. For example:

  • Introverts are more sensitive to criticism.
  • Introverts are stingy with praise. 
  • Introverts need less stimuli to remain mentally alert. 
  • Introverts are stressed out by a lot of stimuli. 
  • Introverts are more prone to depression. 
  • Introverts would be happier if extroverts were not so annoying. 

This is relevant to solo wargamers because we could become socially isolated.  We may be less social than extraverts, but we still need some social interaction.  

Here are my suggestions.

1.  Using appropriate caution, browse appropriate social media sites such as the Lone Warrior and offer a supportive comment now and then when you read something interesting.

2.  When you are feeling more bleak than you want to feel, reach out to other solo wargamers for a brief interaction on the subject of solo wargaming.  It will affirm your own identity.  

3.  De-clutter.

4.  Start a campaign and fight a few battles in the same era with the same rules. This will be easy and enjoyable.  We do not have to learn new things all the time; using what we already know is ok.  After all, we learned what we now know because we wanted to use it. 

Thank you to visitors

Looking back, it seems I started blogging on solo wargaming about one year ago.  Since then, over 11,000 people have visited the site.  This volume is a big surprise.  No doubt, some of the traffic has been through the Lone Warrior website, which has been an inspiration to me.  Another factor has been the pandemic.  Many social wargamers found themselves pushed toward solo wargaming.  If that disaster truly is passing, perhaps they will go back to social wargaming and traffic to sites like mine will diminish. 

Anyway, I hope some of the ideas presented here have been helpful.  

Thanks to all for visiting.  

Should you love your miniatures?


This quote is from Neil Thomas, Wargaming Nineteenth Century Europe 1815-1878.

"Miniature wargaming has advantages over such contrivances as grids and ‘free kriegspiel’, however. Chief among these is the visual beauty of painted miniatures and three dimensional tabletops. Playing a structural wargame or a ‘free kriegspiel’ can be a curiously bland experience: one can feel almost divorced from the action. Miniature wargaming in contrast effectively predicates direct involvement, for the tabletop general identifies closely with the army he or she has collected and painted. This experience of empathy is a vital part of realism, allowing wargamers to put themselves in the position of historical generals: wherever they see an enemy unit routed they feel the elation of victory; the sight of their own units being destroyed engenders all the anguish and humiliation of defeat. For this is not an abstract body of men represented by counters, or sketches on a piece of paper–these are the wargamer’s very own little men. In this way, a miniature wargame can re-enact the historical experience in a manner very different, and infinitely superior to its physically anaemic ‘free kriegspiel’ rival. The problems of scale do however remain. The best approach to miniature wargames design lies in recognising their intractability, by appreciating that any game using figures is an abstract construct..."

While I am big fan of Thomas' One Hour Wargames, I was thrown off by the perspective revealed in the extract pasted above.   Here are my concerns.

1.  "The visual beauty of painted miniatures and three dimension tabletops."   Beautiful is not an accurate description of all tabletops and figures, nor is it necessary.  Bob Cordery used this phrase to describe what he is doing with his style of wargaming: 3D board game.  Don't get me wrong; Cordery also uses painted figures.  His approach to the board, however, is only beautiful if you like the abstract style.  I very much like that style, but I am not sure I would describe it as beauty.  Regarding the minis, seeing detailed painting just makes me feel inadequate.  It is a turnoff.

2.  "The tabletop general identifies closely with the army he or she has collected and painted."  Yes, I am fond of the minis I have collected.  Would I enjoy wargaming more if I carefully painted each mini and thus developed a relationship with it (him)?  No, because the minis are so small I can barely see them.  (Maybe this is why some people love tank warfare so much; at least you can easily see a tank.)  

3.  "The sight of their own units being destroyed engenders all the anguish and humiliation of defeat."  I am a solo wargamer so both sides are my 'own units'.  However, I do get an emotional reaction when one side is losing; I start to cheer for the underdogs.  

Let me suggest this distinction: fine modeling and tabletop wargaming can be related activities but they need not be integrated.  In other words, you can enjoy tabletop wargaming without being a fine modeler.  And not all fine modelers enjoy tabletop wargaming.  They might be just as happy building dioramas.  

Where the two activities (fine modeling and wargaming) come together closely is in RPGs and skirmish games.  When you have a small number of figures whose personal traits are important to the play of the game, painting might be more integral to the hobby.  Or so it seems to me as an outsider.  RPGs do not appeal to me.

Am I missing out by not developing a loving, empathetic relationship with my minis?  HA!  Give me a break. It is just a game.  I send those little guys out to get destroyed in every battle. Fortunately, they can be resurrected for the next fight.   I am not playing House; I am playing War.  In my mind, the minis are first and foremost professional soldiers doing a difficult job.  Their uniforms will be tattered and dirty, not neat and beautifully depicted. Heck, the green army can be green figures and the red army can be red figures.  Paint makes no difference as long as I can distinguish the unit type: artillery, cavalry, regular infantry, or heavy infantry.

The enjoyment comes from the excitement of the battle and the uncertainty about the result, not from the paint.


PS.  Have you ever noticed the guys who paint the inside walls of houses for a career often look a bit dopey?  It is the paint.  It fries their brains.  And it is addictive, so they love painting.  

Just sayin'.


Tuesday, March 9, 2021

Scenario 3 from One Hour Wargames

 This battle is set during the Franco-Prussian war in a fictitious location.  Scenario 3 calls for taking control of two fords.  In the photo shown below, the river is in the center of the battle field, a hill (green) is one corner, and a stand of trees is to one side.  North is to the left and south is the right. 

Rolling for forces resulted in the north army (Prussians) having one artillery unit, two heavy infantry units and three regular infantry units but no cavalry.  The French army had four regular infantry units, one heavy infantry unit and one cavalry unit.  The French appeared to be at a disadvantage since they had no artillery and only one heavy infantry unit.  

The French regulars advanced toward the eastern ford, taking shelter in the village.  The cavalry and heavy infantry rushed toward the western ford. The cavalry unit intended to cross the ford and assault the artillery battery.  Unfortunately, they did get there before the Prussian heavies blocked the ford. 

This setback for the French army was followed by a series of bad event cards: confusion, enemy hits, inability to move, ammunition shortage;, some bad events happened more than once.  They were reeling from all the bad luck. The Prussian artillery was dropping shells on the village where the French regulars were dug in.

However, the tide eventually turned.  The Prussian regular infantry took up their position on the eastern ford, firing ineffectively on the French regulars who were under cover in the village. The Prussians were exposed and taking hits from the French.  Meanwhile, to the west, the French heavy infantry and the cavalry unit were firing accurately on the two Prussian heavies, who eventually broke.  This enabled the French units to rush toward the Prussian artillery unit. 

Meanwhile, to the east, the Prussian regulars lost a unit and retreated back from the ford, so the French regulars advanced.  They outnumbered the Prussians and pressed their advantage.

Shortly thereafter, the artillery battery was destroyed and both the French cavalry and heavies moved toward the surviving Prussian regulars.  The French regulars continued to pepper them with shots.  The last Prussian unit was broken in round 10.  The battle lasted 20 minutes. It was fast and full of action.  The outcome surprised me.  I will try it again soon. 


An interesting battle report from the Thirty Years War

 https://balagan.info/battle-of-schlossmuele-a-tillys-very-bad-day-battle-report

This report was written in an interesting style.  Note that a brief but useful introduction gives the historical background.  A diagram shows the plan for the battlefield.  A single photo shows the actual battlefield used.  The report of the battle provides a nice summary of the action and the results of the rounds without too much detail.  The battle lasted less than ten rounds, which is just fine with me.  Keep in mind that when you develop a battle like this, you are most likely going to play it through several times, with variations.  

Anyway, I liked the style of this battle from the 30 Years War. 

Wednesday, March 3, 2021