Wednesday, December 16, 2020

Vehicles

 Wargaming in eras after WWI requires vehicles.  Each decade the variety of vehicle types increased.  Deciding which types of include in your battles is one issue.  Another is where you obtain the vehicles.  This brief post compares Airfix plastic, Matchbox, and Corgi vehicles.  The scale of the figures should, of course, match with the scale of your figures.

The vehicles shown in the photos are placed with Airfix 1/76 figures, but Airfix 1/72 look about the same.  The first picture shows a Corgi Tiger tank.  The second picture is a Corgi halftrack.  The third picture is two Matchbox Humvees.  The last picture shows an Airfix plastic tank.  Assembly was required on the last one and of course I messed that up.  The Corgis and the Matchboxes are diecast.  The Corgis have the highest level of detail.  They are handsome vehicles.  The Corgis shown were only $12 because I bought them on sale from Amazon.  This is affordable if you do not intend to build a large army.  However, if you do not watch for sales the price of a Corgi can be prohibitive. 


Saturday, November 28, 2020

Random Arrival of the Enemy

 Previously, many of us have introduced uncertainty into solo wargaming by having enemy units arrive each round at a randomly selected edge of the battle field.   This works well and I heartily recommend it.  

However, you can take the idea further when playing modern forces.  Consider airborne units dropping at random locations on the battle field.  This could apply in World War II scenarios, modern warfare, or future warfare.  Science fiction scenarios might have troops arriving in space shuttles or even as individuals (as Iron Man does).

When airborne units arrive, they might be scattered and will need to regroup.  Their battle plan is to cluster their forces as soon as possible.  As the defender, your job is decimate units as they arrive.  However, you would not engage 1-1.  Instead, 2 or 3-1 would be better.  Lacking those odds, you would withdraw and attempt to link up with your other units. 

Your tactical challenge is to use cover well, to prevent the enemy from grouping up, and to avoid losing battles.  And, of course, to be lucky when rolling the dice.

Saturday, September 19, 2020

Battle of the Pomeranian Bridge (1890)


Scenario

The German Empire, in this light steampunk scenario, had by 1890 consolidated its control over central Europe.  The Russian Empire justifiably fears German aggression and decides to strike first by weakening the German position in Pomerania.  Russian units will move northward from Poland.  This is a sneak attack and so the German Airships will be unable to reinforce before the action has begun. Sky Marines will be dropped in as reinforcements during rounds 1, 2 and 5.  In addition, the German boffins have developed portable machine guns and the Kaiser’s High Command distributed them to heavy infantry units on the eastern front.  The Russians have no special steampunk technology of their own.  However, The British developed short-range mortars which they are generously allowing the Russians to test.

Mission Objectives

The Russian army (south) seeks to take and hold the bridge as a primary objective.  The German army seeks to prevent the Russians from holding the bridge.  The map shown below is patterned after one shown in One Hour Wargames (Thomas 2014).  The map and order of battle are taken from Scenario 5: Bridgehead.

Victory for the Germans is to control the bridge.  Victory for the Russians is there being no German units within 12 inches of the bridge on the north bank.

Battle Plan

The Russians will batter the Germans with an artillery barrage when the battery arrives.  Their artillery will target the German artillery on the hill.  All infantry units will begin moving toward the bridge when they arrive.  The Russian army is closer to the bridge than the Germans, so they will reach it first. The cavalry holds back. Infantry units will cross the bridge and defend the units still crossing.  All units will engage the German units with small arms fire, seeking flanking opportunities. After the German army takes several hits they are expected to retreat.  Russian army units will then advance into German territory.  The cavalry will seek to flank the infantry.

The Germans will advance three infantry units toward the bridge.  One will attack frontally and the other two will execute left and right flanking maneuvers, remaining out of range of Russian units still on the south bank of the river. 

The German artillery will be placed on the hill.  The battery will target the Russian artillery.  1st infantry moves to support the artillery on the hill.  Those two units will defend the hill and provide reinforcements to the forces at the bridge. The cavalry unit holds back.

Order of Battle

Symbols shown on the units are as follows: X=infantry, /=cavalry, and a circle=artillery.  Black signifies German and White signifies Russian. Units were not chosen randomly.  (See table below.)

The Russian force is composed of four infantry battalions (one heavy), a cavalry company and an artillery battery.  The defending German force consists of three infantry battalions, one heavy infantry battalion, one cavalry company, and one artillery battery.


Russian Brigade.   Col Dimitri Parsky


German Brigade.  Gen Alexender von Kluck

1st Infantry battalion

1st Infantry battalion

2nd Infantry battalion

2nd Infantry battalion

3rd Infantry battalion

3rd Infantry battalion

4th Infantry battalion (Heavy)

4th Infantry battalion (Heavy)

1st Cavalry

1st Cavalry

1st Artillery

1st Artillery


Rules

The rules are taken from One Hour Wargames by Neil Thomas (2014).

The hill provides cover (divide by 2).

Infantry hits (D6).

Heavy infantry hits (D6+2).

Flank attack hits (D6 x 2).

Cavalry dismount to shoot.  Hits (D6-2).

Artillery hits (D6).

There is no hand to hand combat.

Shooting is in a 45-degree arc forward.

Movement is 6 inches except cavalry, who can move 12 inches.

One side moves some units and shoots with other units.  Then, the other side finishes the turn.

You cannot move and shoot in the same turn.


Battle Report

Following the scenario as suggested by Thomas, the sequence of deployment was as follows:

One Russian unit was deployed north of the river within 6” of the bridge.

Turn 1.  2 German units deployed using special rules (D6 1-2=point A, 3-4=point B, 5-6=point C). Points A, B and C are north of the bridge.  Point A is on the west, point B is north and point C is on the east. 

Turn 2.  Russians deployed one unit at point D.

Turn 3.  Germans deployed 2 units using the special rules.

              Russians deployed one unit at point D.

Turn 4.  Russians deployed one unit at point D.

Turn 5.  Germans deployed 2 units using special rules.

              Russians deployed one unit at point D.

Turn 6.  Russians deployed one unit at point D.

The picture below shows how the battlefield looked after all the units were deployed.  The German battle plan called for deployment of the artillery unit on the hill.  However, the artillery battery appeared from the west, so deployment to the hill was not practical.  This turned out not to be a disadvantage for the Germans.  The Russians, on the other hand, were hampered by slow deployment across the bridge.  In short, the battle plans were obsolete almost immediately.


The Russians were able to hold for a while, but 1st infantry was taking too many hits and was destroyed in round 6 (see picture below).  The Russian cavalry were now exposed to fire from two directions.  The good news was that the late arrivals were able to face off against the German units to the west of the road.

The German 1st infantry also was destroyed in round 6.  


The Russian 2nd infantry was destroyed in round 7.  The Russian artillery was destroyed in round 8. At this point, it appears that the Russian cavalry should have disengaged and tried to flank the German 2nd infantry.  Instead, they continued to fire at it; it was destroyed in round 9 along with the German 3rd infantry.  Miraculously, the Russian cavalry survived until round 10.  The Russians lost the 3rd infantry in round 9. The remaining two Russian units (the cavalry and 3rd infantry) were scattered in round 10.


After-Action Report

This scenario worked well.  It turned out to be a straight pitched-battle but I believe that was partly due to the strange luck in random deployment of German forces and partly due to poor tactical decisions made by the Russian leader during the heat of battle. 

The battle lasted 44 minutes.  Some of that time was devoted to recording hits and movements. Also, I had to think carefully for special deployment, but hopefully during replay this will be less distracting.  Even though I have been using One Hour Wargames rules exclusively for a long time, I confess this is the first time I have played one of Thomas’ scenarios because they looked a bit mundane to me. To my delight, I found playing this scenario to be richly rewarding.  I will definitely play the scenarios as written more often.

This is the first game in which I used the flat unit markers.  The reader will have to judge whether the action was as apparent in the photos as it would have been had miniature figures been used, but I found that it was easier to distinguish the unit types with the flat markers.  They are a lot cheaper than figures; just make them in a word processing program and print them out.  Or make them by hand.  Not being embarrassed about my sloppy paint jobs on figures is a plus. The idea for using markers like this came from the many articles published by Scott Hahn in Lone Warrior, but mine are a lot simpler than his.  See Hahn (2014) for an example of his work.

For this game I used a battle log sheet to record deployment, movements, attacks, hits, total hits, and when units were destroyed.  I would show a picture of the log pages but my scribbles would not be helpful.  The columns were round, attacking unit, defending unit, hits, total hits, and movement.  Recording the game consumed three pages in a steno notepad. 


References

Featherstone, Donald and Curry, John (2013).  Donald Featherstone’s Solo-Wargaming.  Kindle edition.  First published by Kayle and Ward, London, 1973.

Hahn, Chris (2014).  The Governor’s Gamble AAR.  Published in Game Reports, Lone Warrior. https://lonewarriorswa.com/the-governors-gamble-aar


Thomas, Neal (2014). One-Hour Wargames: Practical Tabletop Battles for those with Limited Time and SpaceKindle Edition.  Pen & Sword.


Friday, September 11, 2020

Battle of the Blue Rhinocorn (1899)


The Islands of Gurensey, Herm and Sark (left to right) seen from space (https://en.wikipedia.org/wiki/Guernsey)


Scenario

After the conquest of Sark, the High Command of the German Empire planned to expand its base in the English Channel by taking the larger island of Gurnsey.  Guernsey was protected by the Royal Guernsey Militia, a force that the Germans did not take lightly.  In 1898, the Militia won the Kolopore Cup, a shooting competition open to all countries in the British Empire, excluding the mother country.  In 1899, the Queen's Prize was won by Private William A. Priaulx.  The Queen's Prize was considered to be the most coveted shooting prize in the world.

The strategic goal for the Germans, obvious to all, was a strong position in the Channel from which the German Empire could monitor and perhaps threaten both the British Empire and the French Republic.  A secret objective was known only to a few: capture of the Blue Rhinocorn.  The rare Blue Rhinocorn, like the Guernsey cow, was a species uniquely developed in Guernsey.  German physicists theorized that the milk of the Rhinocorn could be used to synthesize a powerful laser.  They intended to use the laser in a handheld weapon to be named the Blue Ray Gun. 

Order of Battle, Battle Plans and Rules

The Royal Guernsey Militia is composed of four units of infantry; all are expert marksmen. The German force contains six units of marines.  Each unit is represented by four figures mounted on a four-inch base. 

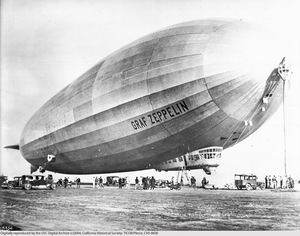
The German Sky Marines were dropped from their airship on the southwestern shore and advance toward the center. One objective is to take the lighthouse and the other is to take the village.  

The Militia is based on the northeastern shore. They will attempt to prevent the Germans from taking either the lighthouse or the village.  They will send some units toward the center despite being outnumbered and deplete the German forces with expert sniper fire. 

One Hour Wargames rules for the machine age are used (Thomas 2014). There is no hand to hand combat.  Shooting range is 12 inches. One D6 determines hits for the Germans but for the Militia hits are D6+2 because they are sharpshooters.  Cover reduces hits by 1/2.  Flank and rear attacks double the hits. Neither side has artillery or cavalry. Movement is six inches (8 inches on the road). Units are removed after 15 hits. 

Figures are 1/72 Airfix soldiers.  The Militia are in brown and the German Marines are in black. No event cards are used.


Round 1.  
Militia units advance 6".  4th Militia heads toward the village.  1st Militia heads toward goes toward the lighthouse.
German units advance 6".  1st German goes toward the lighthouse.  4th, 5th and 6th German go toward the village. 


Round 2.
4th Militia reaches the village.  1st Militia gets to the hill but cannot touch the lighthouse. 2nd and 3rd Militia hold on the road.
1st German touches the lighthouse and takes cover in it. The other German units advance 6".


Round 3.  
1st Militia fires on 1st German - 1 hit
2nd Militia fires on 2nd German- 7 hits
3rd Militia fires on 3rd German- 3 hits
4th German moves to flank 3rd Militia.
1st German fires on 1st Militia - 3 hits
2nd German fires on 1st Militia - 4 hits
3rd German fires on 3rd Militia - 4 hits


Round 4
1st Militia withdraws 6"
3rd Militia withdraws 6"
4th Militia fires on 5th German - 4 hits
1st German fires on 1st Militia -1 hit
2nd German fires on 2nd Militia - 1 hit
5th German fires on 4th Militia - 2 hits
6th German fires on 4th Militia - 1 hit


Round 5
1st, 2nd and 3rd Militia move
4th Militia fires on 5th German - 8 hits
1st-4th Germans move
5th German fires on 4th Militia - 2 hits
6th German fires on 4th Militia - 1 hit


Round 6
1st Militia fires on 2nd German - hits
2nd Militia fires on 2nd German - 3 hits
3rd Militia fires on 3rd German - 7 hits
4th Militia fires on 5th German - 5 hits (destroyed)
2nd German fires on 2nd Militia - 4 hits
3rd German fires on 2nd Militia - 4 hits
4th German fires on 4th Militia - 1 hit
6th German fires on 4th Militia - 3 hits


Round 7
1st Militia fires on 2nd German - 5 hits (destroyed)
2nd Militia fires on 3rd German - 6 hits (destroyed)
3rd Militia fires on 4th German - 4 hits
4th Militia fires on 6th German-7 hits
2nd German fires on 2nd Militia - 6 hits (destroyed)
6th German fires on 4th Militia - 4 hits

Round 8
1st Militia fires on 1st German - 6 hits
3rd Militia fires on 4th German - 3 hits
4th Militia fires on 6th German - 4 hits
4th German fires on 3rd Militia - 5 hits 
German fires on 4th Militia - 3 hits

Round 9
1st Militia fires on 1st German - 3 hits
3rd Militia fires on 4th German - 3 hits
4th Militia fires on 6th German - 4 hits (destroyed)
1st German fires on 1st Militia - 6 hits
4th German fires on 4th Militia - 4 hits (destroyed)

Round 10
1st Militia fires on 1st German - 6 hits
3rd Militia fires on 4th German - 6 hits (destroyed)
1st German fires on 3rd Militia - 2 hits (destroyed)

Round 11
The Militia retreats to the village and the Germans retreat to the lighthouse. 

Total elapsed time: 33 minutes.  The Germans did not see the Blue Rhinocorn.

Conclusion

This battle ended in a draw.  The superior marksmanship of the militia saved them from complete destruction by the Sky Marines.  However, I confess that I had to play through twice to achieve this result.  The Sky Marines did not attempt the flanking maneuver in the first game and the militia did not withdraw soon enough. As a result, the first battle ended after only 12 minutes with a lopsided German victory. 

This game was the first One Hour Wargame (OHW) I have played this year with several figures on a base.  This method is classic OHW.  Previously I had only one figure per unit.  For some reason, I confess to being more satisfied with four figures per base.

The other change from recent games is the decision to include less terrain.  Once again, this is classic OHW.  The sparse and 'clean' battlefield has visual appeal.

Lastly, I must confess that my notes were incomplete in places and I had to back-fill a few elements in the round-by-round report.  Hopefully, the insertions were accurate.


References

Thomas, Neal (2014). One-Hour Wargames: Practical Tabletop Battles for those with Limited Time and SpaceKindle Edition.  Pen & Sword.

https://en.wikipedia.org/wiki/Guernsey


Wednesday, September 9, 2020

Battle for Sark (1899): A Light Steampunk Scenario

 Scenario

This is a steampunk scenario, extrapolated from the Victorian era to 1899.  The German Empire has a fleet of airships used as troop convoys for Sky Marines.  The Kaiser's High Command has decided that taking control of a channel island would offer strategic advantages; both Normandy and Great Britain can be monitored from a channel island.  The island of Sark was chosen.  It is small enough to be easily taken and easily defended yet large enough to serve as an airship base. The resident population of Sark is 150 people who are mostly miners and fishermen.  Sark is not a British possession.  The Channel Islands are independent but enjoy British protection.  They speak their own dialect, neither English nor French. At one time, the island was a useful base for pirates.

File:Guernsey and Alderney with Island of Sark 1748.jpg - Wikimedia Commons


Free Images : house, building, chateau, home, village, tower, cottage,  church, chapel, place of worship, england, monastery, estate, historically,  jersey, united kingdom, rural area, quarry stone, channel islands, sark,  spanish missions in

The airships are an important technological advance for long-distance travel.  However, Sark can be quickly reached from the British mainland by surface ship.  Also, airships have more limited capacity for freight than larger surface ships. 

Free Vintage Scientific Illustrations from 1883 Antique Science Journal |  Free Vintage Illustrations


Balloon | Free Images at Clker.com - vector clip art online, royalty free & public  domain


The British also have a useful technological innovation.  One of their boffins invented a mortar.   This is like a small cannon that throws an explosive shell in a high ark.  Mortars are surprisingly accurate against infantry positions.

Sub-machine guns (handheld) have come into wide usage in the British army in this alt-history.   The German army developed them but does not issue them to Sky Marines because the airships lack sufficient cargo capacity to carry the extra ammunition required.

In this scenario, the Sky Marines have descended from the airship transports via ropes and have formed up on the eastern beach.  They have no horses and no artillery. British observers detected the German airship convoy en route and dispatched their own infantry by ship. The British and German units arrived at Sark simultaneously.  The British disembarked on the northwest corner of the island.  Both forces will move toward the center.

Order of Battle and Battle Plans

The Sky Marines, dressed in black uniforms, consist of one company, ten units of ten soldiers each.  They have no cavalry and no artillery. The British (brown uniforms) have a short company, six units of ten soldiers each.  Two units are mortar units and two are machine guns. All figures are 1/72 Airfix models.  One figure represents ten soldiers.  Figures are based individually.

The German mission is conquest.  Their objective is to occupy the lighthouse which is located at the highest point on the island.  (In our history, this is a windmill.) The lighthouse can be used to moor the airships and also to allow a wide range of view for incoming threats. However, the structure is small and can only hold two units inside. 

The German force intends to divide into two sections.  One will move to the street and advance toward the center of town. They will occupy the police station, use it as a command post, and take control over the weapons locker.  The other German units will move directly toward the lighthouse. They are unaware of the British force.  

The British units intend to prevent the Germans from achieving their mission.  They will occupy the police station and hold it.  They also will occupy other structures in town and fire on advancing Sky Marines. By adopting a defensive posture they are forcing the Germans to dislodge them. 

The playing field is about 60x40 inches.  The structures are HO scale. 

Rules

One Hour Wargames (Thomas 2014) is the source of the rules. Rifle hits (and mortar hits) are equal to one D6. Machine guns hit D6+2. Cover reduces hits by .5. Units located in buildings may fire in 360 degrees, meaning they can fire in any direction. Each unit can withstand 15 hits.  No event cards were used.

Battle Report

The first picture shows the view from the eastern shore where the Germans have arrived. 


The second picture shows the view from the western shore where the British have arrived.


The Germans begin advancing.  Half of their force moves rapidly up the street.


The other half is moving more slowly across broken terrain toward the lighthouse.


The British reach the police station and occupy it.  They also take possession of the lighthouse.


When the Sky Marines get within range, the two British units in lighthouse fire on them. 


The British units in the  police station caught one German unit in the middle of the street and inflicted some hits.  That unit quickly moved into the storefront on the north side of the street but additional hits took it out of action..  The other German units took cover in the cafe then moved to the next building where they were within range of the police station. 


The five Sky Marines assaulting the lighthouse prevailed over the two British units, despite the latter having the advantage of cover.  The Germans occupied the lighthouse but three of their units were outside the structure. 


The police station is now in a crossfire.  The British were able to destroy some units across the street and some units in the lighthouse, but eventually only one British unit remained in the police station.  The outcome was inevitable at this point. 


Conclusion

This battle was completed in 25 minutes.  Moving into position required several turns.  After the opposing units began exchanging fire, the larger size of the German force overcame their lack of cover.  

The 1/72 figures worked out well for me.  I will admit my bias against them was not justified.  Smaller figures allow for a less crowded field on a small surface. Since they work with HO and OO scale, trains could be added as props.  The reader will note that my battle report does not show any close-up shots of the figures.  This is because they are not painted in detail. One group is black and the other is brown. They are based on small plastic chips covered with sawdust. During game play, fine details are not visible for any figure, at least to my eyes, because of the distance from figure to eye. 

In the future, I will acquire some cavalry units and also artillery in 1/72 scale. The island of Sark might be the site for a battle between more diverse forces. However, I do not think cannon or cavalry can be carried on airships. 


Sunday, September 6, 2020

Battle of Sokolowo (1848)

Scenario

Poland had been partitioned by other powers for centuries but in 1848 Polish patriots believed they were encouraged by the King Frederick William IV of Prussia to become independent so that Poland could serve as a buffer against Russian aggression.  However, the King turned against them when they moved towards independence. (See the Wikipedia article on Greater Poland Uprising for details.  That is the source of all the facts reported here.) Ludwick Mieroslawaski was the military leader of the Polish forces. 

The situation deteriorated quickly.  Poles harassed the local Jewish population, who then sided with the Germans living in the area.  German settlers harassed Catholic priests. In some areas German militias were formed and soon Prussian efforts to pacify villages turned to "unrestricted terror."  The Polish peasants were driven to join the revolt.

This hypothetical battle takes place at the village of Sokolowo which I am pretending is nestled in a valley between a long ridge to the west and a hill to the east.  A flat plain to the south is dotted with rocks and a few copses of trees. 

Rules and Order of Battle

Rules are from  One Hour Wargames, Rifle and Sabre era (Thomas 2014).  Cavalry can charge but not shoot.  Infantry can shoot but not charge.  

Hits are counted as follows:

Cavalry: D6

Infantry: D6

Artillery: D6 minus 2

Rear and flank attack: D6 times 2

Cover: D6 divide by 2

After a charge, cavalry drops back 6".

Each figure represents one unit.  One unit represents ten soldiers.  Each unit can withstand 15 hits. The battle plan for the Polish forces is to occupy the village and hold it.  Some infantry will advance across the plain toward the Prussian artillery.  The Polish cannon will target the Prussian cannon.  The Polish cavalry will hold back until they see an opportunity to defend against Prussian cavalry charges.  Other infantry units will be held in reserve near the road into the village.

The Prussian plan is to advance infantry into the village.  Since each figure represents one unit, one infantry figure fills the road and cannot be passed by cavalry or other infantry.  When the road is clear, the Prussian cavalry will sweep into the plain and assault Polish infantry from the rear or flanks.  The Prussian artillery will target the Polish artillery.

The Prussian army has six infantry units (sixty soldiers), one cavalry unit and one artillery unit.  The Prussian army has ten infantry units (100 soldiers), two cavalry units, and two artillery units. 

No events cards were used.

Note: Perspective usually is specified in a battle report such as this.  The author states which side he is playing and the other side is the opponent.  However, with clear battle plans, I found this to be unnecessary.  Instead, I played each side in turn, sticking to the plan as much as possible. 

Battle Report

The first picture shows the Prussian army advancing up the road toward the village.


The Polish army has possession of the village. Infantry units in the village are under cover.  The dragoons are lurking behind the village.


The Prussian infantry has arrived at the village.  The Prussian cavalry are able to slip behind them to enter the battlefield.     


The Prussian cavalry assault Polish infantry from the rear. All the artillery units are destroyed early in the battle. 


One of the Prussian cavalry units sweeps behind Polish infantry in another location.  The Polish dragoon has been trying to catch the Prussian cavalry from the rear but has failed so far.


Meanwhile, the Prussian infantry have routed all but one of the Polish infantry units.  In desperation, the Polish dragoons charge the Prussian infantry in the flank.


One Prussian lancer unit finishes the remaining Polish infantry while the other strikes the Polish dragoons on the flank.  The Polish army is finished. 


Conclusion

Total elapsed time was 35 minutes.  The rules worked well.  The battle moved quickly.  The cavalry were very effective.  Their ability to move farther and faster than infantry made up for their inability to shoot.  Cavalry are vulnerable to flank attacks from other cavalry units, but in this battle the plain was broken up with terrain features that forced the Polish cavalry to approach the Prussians circuitously, thus enabling them to strike and escape before they could be engaged.  This is an important tactical requirement if one is to avoid losing the cavalry units after one attack. 

The ridge line was an interesting terrain feature.  It had the effect of forcing the Prussian forces to funnel through a narrow pass, slowing their deployment.  Overall, I feel that the terrain was an asset to the game: two elevations with a plain in between, dotted with a few copses of trees and rocks. This prevented the opposing units from mounting simple straight-line assaults.

References

Thomas, Neil (2014).  One-Hour Wargames: Practical Tabletop Battles for those with Limited Time and Space. Kindle Edition.  Pen and Sword.

https://en.wikipedia.org/wiki/Greater_Poland_uprising_(1848)


Thursday, September 3, 2020

Sally Forth!

 The Scenario

Wilfred, the old Baron of Saxe-Gotha, resides in a small castle in central Europe.  His neighbor to the south, the Count of Liepzburg, recently died and his son, Friederick, has assumed the role. Friederick convinced himself that Saxe-Gotha should pay fealty to Liepzburg and has sent a small army to impose that decision.  Attacking an equal-sized force in a strong defensive position might seem unwise, but the Count knows the the Baron must sally forth.  The Baron cannot just wait in the castle until the Count leaves because the harvest must be brought in.  

The attacker arrives in the southeast corner of the field.  

Battle Plans and Order of Battle

Both sides have five units: two foot-knights, two mounted knights, and one archer unit.  One Hour Wargames rules will be used.  No event cards will be used. 

The defenders will place infantry directly in front of the castle.  Their backs will be protected against flank attacks.  The mounted knights will swing out.  Their orders are  to attack the flanks of the invaders and to defend the flanks of the defending foot-knights. The archer remains behind cover on the battlements.

The attackers will move toward the castle.  The mounted knights will swing out to defend the flanks.  The archer will take up a position in the northwest corner of the church yard.  This position is  behind cover and within range of the castle. 

The Battle

The first picture shows the positions at the beginning of the battle. 


Rounds one-three: Attacking infantry advance six inches.  The archer heads toward the church.  The knights swing out.  The defending knights sweep out also.  


The attacking archer lets fly at the defending infantry.  One of the defending knights attacks the left flank of the attacking infantry.  


Now the battle is well and truly joined.  A knight from the attacking force hits the Baron's unit of knights in the flank.  The Baron's second unit of knights returns the favor so the Count's second unit of knights joins the fray. Meanwhile the attacking archer shoots at the defending foot-knights and the defending archer shoots at the attacking foot-knights. 


Eventually, both of the Baron's cavalry units are routed, leaving the Count's army with all units intact, but battered.  They move toward the foot-knights who are defending the castle.  The attacking archer unit fires at them while the defending archers shoot at the Count's surviving infantry unit.  


When the count's units frontally attack the castle, they are already suffering from a large number of hits.  The Count's unit of foot-nights is wiped out by the archer before reaching the castle and both units of mounted knights are scattered by the archer and the infantry, leaving one surviving infantry unit in possession of the castle and a battered archer unit. The Count's unit of archers is unscathed but unsupported so they have no choice but to withdraw. 


Conclusion

This battle took a surprising turn toward the end.  I thought the Count's forces were going to win.  However, frontal assaults are not as effective and when your knights have already been weakened, the victory is not guaranteed.  The game was fast and exciting.

Replay

The same battle plans were used in the first replay.  This time the Count won, with one unit of mounted knights and the archer unit surviving. 

In the second replay, both defending foot-knight units survived.  Only the archers survived on the attacking side. 

Insight

Honestly, I did not feel like I was playing against an opponent.  I was rolling for each side in turn and cheering for whichever side I was rolling for.  Also, I recommend planning to play three times.  These are fast games and a triple works out about right as far as time goes. 


Wednesday, September 2, 2020

How to play the opponent in a solo wargame

Several readers have commented over the last couple of  months.  Most are interested in One Hour Wargames as a rule set but regardless of rule set, the problem faced by the solo gamer is how to play the opponent.  The Men Who Would Be Kings, if I remember correctly, has an approach to this in which a mythical player called Mr Babbage provides some rules primarily relevant to the native opponents facing the colonial European powers.  Looking at Babbage's ideas might be helpful. 

However, unless your scenario is colonial, they may not be exactly what you need.  A simple expedient is to place the opponent in a defensive position.  Your army must assault the defenders.  That way no  decisions need to be made for the opponent.  They just shoot at the nearest attacker. 

Another approach is to play a scenario in which your forces are a relief column wending its way across country.  The opponent's forces pop up at random (event cards) on either side, at the rear, or in front.  The event cards might also include natural events such as bad weather, animal attacks, shortages of food or water, and so on.  In this situation, you are playing against nature as well as the random opponent. 

A third approach, if you want a fast game, is to randomly deploy both your forces and the opponent's forces.  The decision rule for the opponent is to attack immediately if he finds himself near enough to your unit to do so.  Otherwise, he will cluster his forces.  I find that making decisions for the opponent is easy because the actions are obvious.  I also find that I have accidentally switched sides sometimes if one side has a run of bad luck. 

****

PS  After a while, playing the opponent becomes effortless.  I play both sides to the best of my ability.  If I have a bias, it is in favor of the side that is losing. Does a kid playing army have trouble playing the opponent?  No.  Wargaming is grownup kids playing army.

Wednesday, June 3, 2020

Battle Between Mercenary Companies


In this battle, the Gold Company is hired by one Italian city-state and the White Company is hired by another.  Each company has four units: one mounted knight, one archer, and two foot knights.  Each unit (represented by one figure) contains ten soldiers.

One Hour Wargames rules were used - medieval version.  Each unit can absorb only 15 hits. Archers and infantry units can only move six inches each round.  Cavalry can move 12 inches.  Archers can shoot 12 inches but cannot shoot over the heads of the men-at-arms. Cavalry have +2 hits in their attacks but no armor protection.  Men-at-arms have armor protection. Archers get +2 with shooting but in hand-to-hand they are  -2 hits.  They have no armor.

One d6 is used.  Each army has a deck of chance event cards. The objective is to destroy the enemy.  I played the White Company. 


Picture 1.  The opposing armies.
Initial deployment was random.  See picture 2.  The gold units were concentrated on the west side, with the archer in the center at the back.  The white company was in the west and center with one infantry unit in the southeast.

Picture 2.  Initial Deployment
At the outset, the forces gravitated toward the west side north of the church.  The white infantry held back, waiting for the rest of the White Company to get closer.  The white archer unit stayed under cover so that the enemy archers could not get a shot.  However, the white archers had line of site on the gold infantry.  Finally, the white cavalry unit could not resist charging.  After a few rounds, both armies had lost their mounted knights. See picture 3.

Picture 3.  Midgame.

White Company now appears to be in a good position but it has taken several hits and the men-at-arms are open to flank attacks.  The battle goes against them quickly.  See picture 4.  The white archer wisely chooses to exit the field at this point.

Picture 4.  Endgame.
This battle went seven rounds and lasted 14 minutes.  The reader may wonder how I managed to lose an equal battle.  Was it the initial deployment?  Unfortunately, I must confess that this was my second attempt.  In the first battle, the initial deployment was more central and the action revolved around the trees in the center of the field.  The White Company lost in six rounds, 13 minutes. 

There must be a lesson in this for me. What might it be?  Don't attack with cavalry.  They need to hold back until they can mount a devastating flank attack.